
Well.... First off we need to start with an apology. We promised we'd start the wedding release last week on our one month anniversary but as things generally go with us, a few other things got in the way.
So this is our first post as Mr & Mrs Costa!! Its been an amazing journey we've taken together so far and we really thank everyone who has been following us and involved in any part of the last 4 years. We are so happy we get to share our happiness and joy with other people and our plan is to keep sharing our journey, good and bad, together in the future! For now we have to change our bio and get on with showing you one of the happiest days in our life so far!
Rather than show you the wedding from start to finish in one post we thought we would break it down a little more so we can talk about what we did, how we did it and share some of experiences with you (whilst not creating the worlds longest post, plus we totally get to string out our content a little longer haha).
So it would be rude not to start with the venue and the invites? Surely the starting point for all weddings?!
Once we had found our wedding venue (the original post you can see HERE) the next obvious task on the wedding list was to get a website together and send out the invites. In our head it seemed like a quick and fairly simple thing to do, but as we sat down and started to write out what we wanted to do and the information we had to hand out, we realised it wasn't the quick job we thought.
We'd somehow decided to not only do a wedding but also celebrate my birthday and also have people come out for as long or as short as they wanted within a 1 week period that we were there. We were not just organising a wedding, we were organising a holiday for friends and family.
So after a casual start off the mark (prior to realising the task ahead) we made a start on the website and with every piece of information we wrote down, we realised we had to do 10 other tasks to get what we needed.
>> WEDDING TIP NUMBER ONE: Start prepping as early as you can, the admin bits at the beginning are the longest and once you get the base of these things down you can start on the fun decoration / planning side. Don't do what i did, which was to dip in and out of the practical items to do the fun stuff, drawing out the practical items and making it more complicated for myself. Our wedding may be an exception against most as i imagine we had different issues from those who would be organising one full day for guests. <<
One big thing with our wedding was the fact we are a multi-cultural / multi-lingual wedding and we didn't want anyone to feel left out. We decided to do both our wedding invites and our website in two languages.
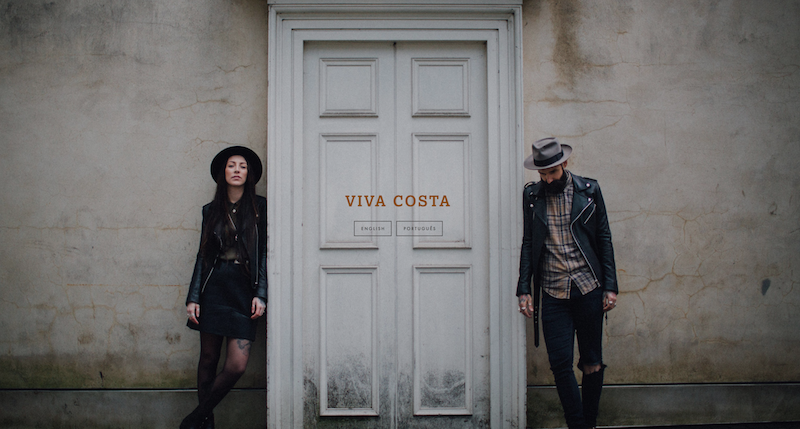
For our blog we use squarespace and for the simple reason that we are familiar with the workings of it, we decided to create our wedding website on it too. After some paid personalisation tweeks we had exactly what we needed and we started to build in the information with (of course) the gorgeous images we had taken before with our wedding photographer and friend Claudia Rose Carter.
We had too much info to just include it all on an invite and so wanted to keep the classic in hand posted invite but revert people to a system we could update and have no restrictions. The results of which were this :
WWW.VIVACOSTA.CO.UK
We got a lot of positive comments about our website and so we can say the hard work was worth it. Putting the extra time in to cover as many questions we thought we'd get asked helped ease the load for the rest of the planning.

We were really stuck on what to do on our invites, nothing really seemed 'us'. We'd decided on the theme colours of white, grey and copper but how it wasn't like we had any other theme which could give us a style to work with.
We then decided that because we had these amazing images that we had used on the website, it would be best to use those and tie in the style that way. After all, our friends and family know us for constantly taking pictures while we are out and about, surely they were expecting to see our faces on our own wedding invite too!
After looking around for inspiration we stumbled on a website called 'Wedding Paper Divas' - We had thought originally we would design our own invites and put a personal touch to them but having already started to use up the graphic experts in the family and friend circle, we found this a perfect medium.
The website is rammed full with template designs that you can customised with colours, images, fonts and in some cases design (they have a in house design team that proof reads your stationary and can make small requested changes, we did a few!) - what really 'sealed the deal' for us was the fact they had just launched a line of stationary which you could add copper foil too!! DONE!
Aside from the invites, we also did a few extra pieces with Wedding Paper Divas.
Once we got looking through their website, we were just so impressed with the offering of items and the simplicity of creating something unique to you that we thought why the hell not!
>> WEDDING TIP NUMBER 2 : Keeping as many things are you can with one supplier simplifies things a HUGE amount. Sometimes during the arrangements process we would be offered a service that we hadn't considered getting from that person / company to begin with and 9/10 times we went with it. Simplifying your supply chain means less hassle and paper trail for you. Sometimes it might not be the best version of that item you had imagined but try and remember the things that all married women say about their wedding... Once you are there, the smaller things don't matter and you will of wished you'd kept your sanity over wasting days trying to find something better. It really is true, but one of those things that some brides to be won't understand until after the wedding. Me included!! <<
The wedding stationary set we used on Wedding Paper Divas was the 'We the wed' set. We made amendments and pulled additional styles from other sets to create our final package but again, this was all done with the help of their amazing design team which you get complete use of while creating your pack.
In addition to the invites we created some grey and copper napkins which we used on the tables for the wedding meal (setting pictures to follow in next posts) and also a photography game for the kids. We teamed up with Lomography to do this, but again... that will be in another post! ;-)


